In the previous post, I was following the AWS "Docker Basics" tutorial. Near the end there was a comment that I needed to do some setup in my AWS ECS before I could run any Docker images. I’ll cover that setup in this post. The link below is for the instructions that I used as a guide:
http://docs.aws.amazon.com/AmazonECS/latest/developerguide/get-set-up-for-amazon-ecs.html
Create an administrator IAM user
I already created an IAM user in a previous post, when I was setting up the AWS Command Line Interface (CLI): Setting up AWS CLI on Linux. I’m not going to repeat every step for creating an IAM user here. If you need to, just refer to my other post.
I created an administrator user in IAM, and named it "admin-user". I also created a new group named "admin-group". I assigned the administrator policy to "admin-group", and then made "admin-user" a member of that group.
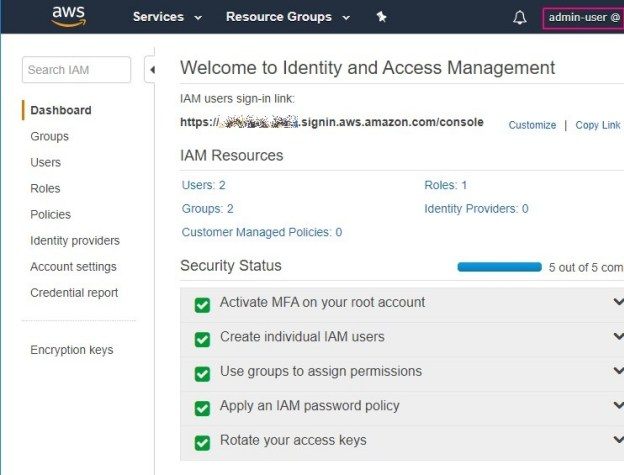
Logged in to AWS Management Console as my new ‘admin-user’
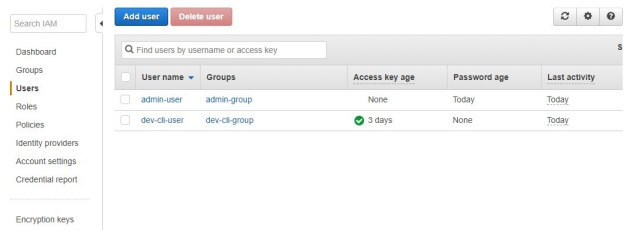
Current list of IAM users in my AWS account
Create a new ECS Cluster
The setup instructions on the AWS page then take a confusing turn. There is a section about creating more IAM users that (I believe) are used by low-level processes that launch ECS containers, etc. Near the end of that section, it says:
The Amazon ECS instance and service roles are automatically created for you in the console first run experience, so if you intend to use the Amazon ECS console, you can move ahead to the next section. If you do not intend to use the Amazon ECS console, and instead plan to use the AWS CLI, complete the procedures in… before launching container instances or using Elastic Load Balancing load balancers with services.
I will probably use the Amazon ECS console. I’d like to keep this as simple as possible, so based on the comment above, I’m not going to create any other IAM users at this time.
I’ll now go back to the ECS console page, and choose the "Clusters" section.

I click the "Create Cluster" button, and get the following options:
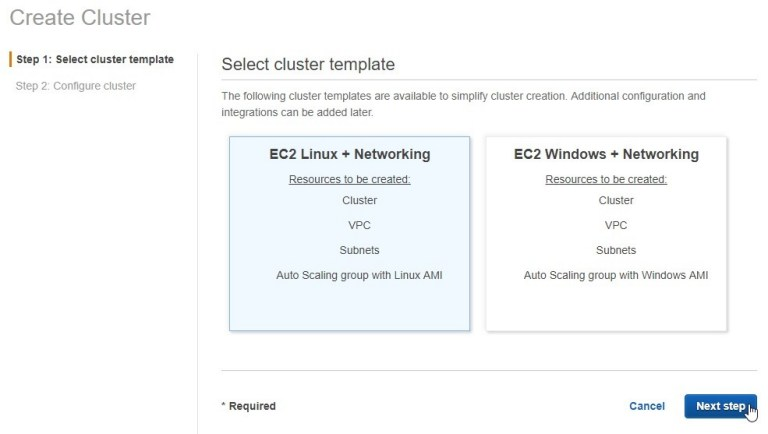
I want Linux-based containers, so I’ll keep the default and click "Next step".
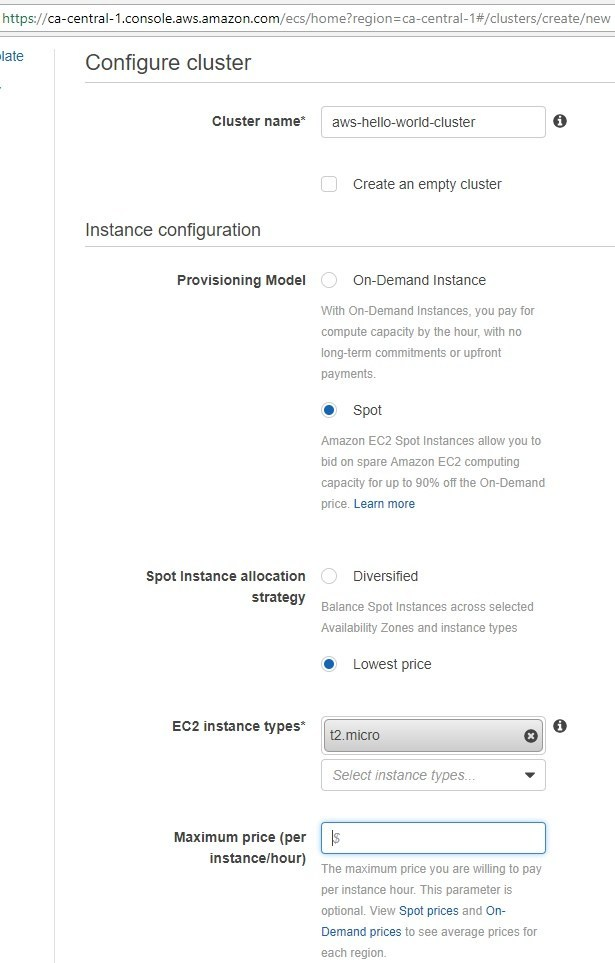
Configuring the new cluster – PART 1
Next you’ll be presented with the "Configure cluster" options. I gave my cluster the name "aws-hello-world-cluster" so I can easily identify its purpose. I’m planning to run a Docker image named "aws-hello-world" in this cluster later.
I don’t know much about the provisioning model settings. I’m creating this cluster for a trivial Hello World example, so it certainly isn’t a problem if my cluster experiences some periodic interruptions. I’ve chosen the cheapest option with "Spot" provisioning.

I haven’t created any key pairs yet…
I’ll leave the default values for "Number of instances" and "EBS storage".
I’d like to be able to SSH into my instances, but I don’t have the option. The message below the dropdown list explains why. I haven’t created any key pairs for my AWS account yet. I’ll take care of that now, and then come back and fix this. The easiest way to get to the right place is to just click the "EC2 console" link in the message.

As expected, no key pairs exist yet. I’ll click on "Create Key Pair", and use a name that’s easy for me to recognize later: "aws-hello-world-keypair"
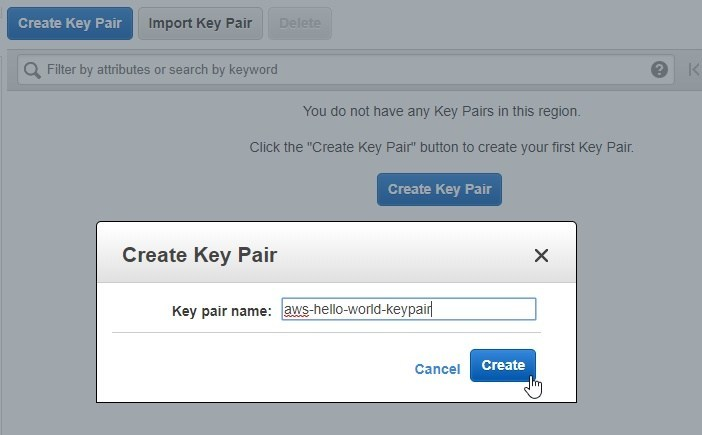
When I click the "Create" button, I’m prompted to download and save my key pair in .pem format, with the default filename "aws-hello-world-keypair.pem". I save the .pem file on my workstation, and then go back to the AWS console.
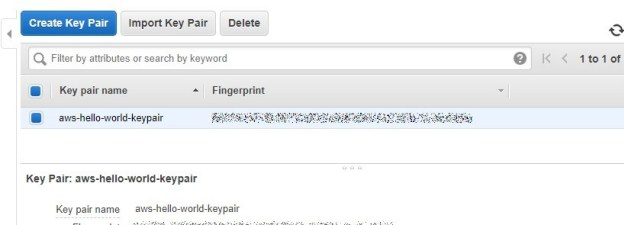
My newly created key pair
Back on the ECS page, after clicking the refresh icon, I now have the option to use my new key pair.

Selecting my new key pair for use by this cluster
Next up is the Networking section. Initially, it should look like this:
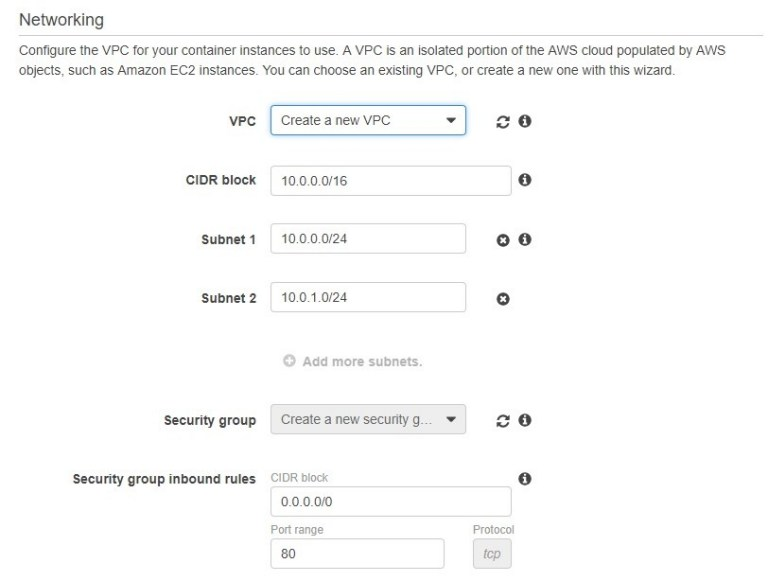
I’m going to leave all these default settings. The Docker image that I’m going to deploy is trivial, and only requires that port 80 be open.
I don’t know anything about the last two options, other than the description provided on the page. I’ll just leave the default values.
Looks like the only thing left to do is click "Create".
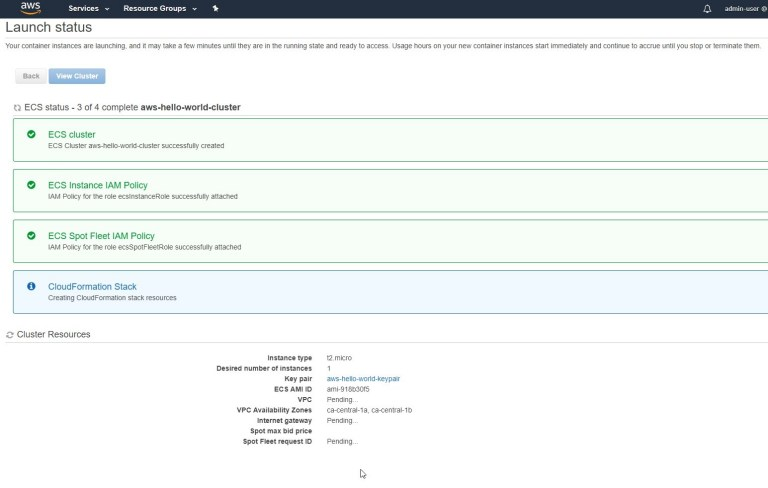
And away we go…
The bottom of the page will update as AWS configures things. It took about 1 to 2 minutes for mine to finish, at which point all the tasks at the top showed green.
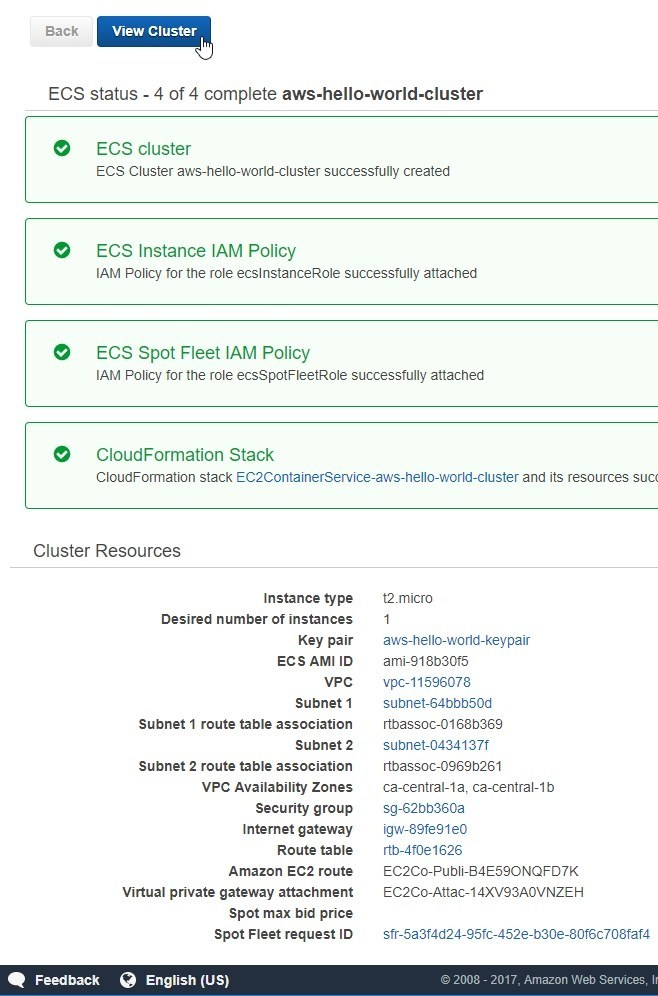
Cluster creation completed
Now I click on the "View Cluster" button.
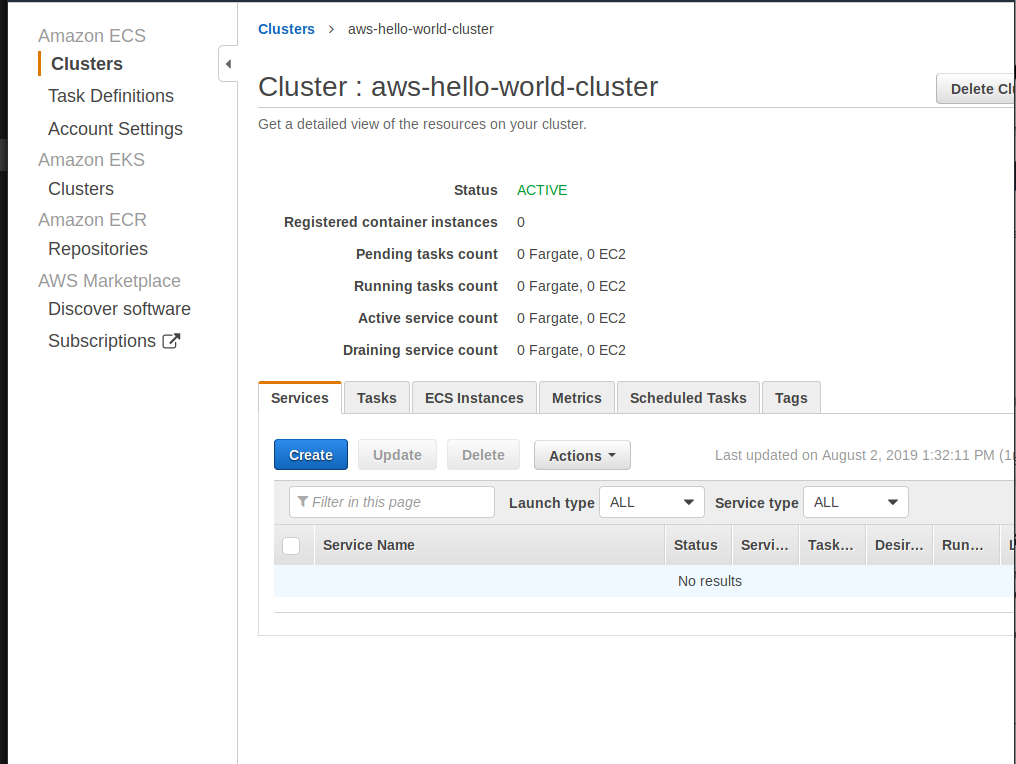
My newly created ECS cluster
The cluster has been created, and it has no container instance, and it isn’t doing anything yet. The "tasks" count is showing zero. My understand of ECS is that a "task" is equivalent to a running Docker image. That may be an over-simplification, but for now it’s probably a good enough understanding to get this Hello World example working.
(Optional) Register EC2 Instance to ECS cluster
It may be not obvious but sometime you need manually reqister your EC2 instance in Cluster.
Open "EC2" in menu and go to "Instances". Click right mouse button on your instace – Instance Settings – View/Change User Data and copy past next code
The AWS "Docker Basics" tutorial that I referenced above provides a simple Dockerfile that will produce a very simple Docker image. The Dockerfile content is:
#!/bin/bash
echo ECS_CLUSTER=aws-hello-world-cluster-cluster >> /etc/ecs/ecs.config
https://docs.aws.amazon.com/AmazonECS/latest/developerguide/launch_container_instance.html
And run your instance again Right click – Instance state – Start. Wait a few minutes while initialization will be finished.
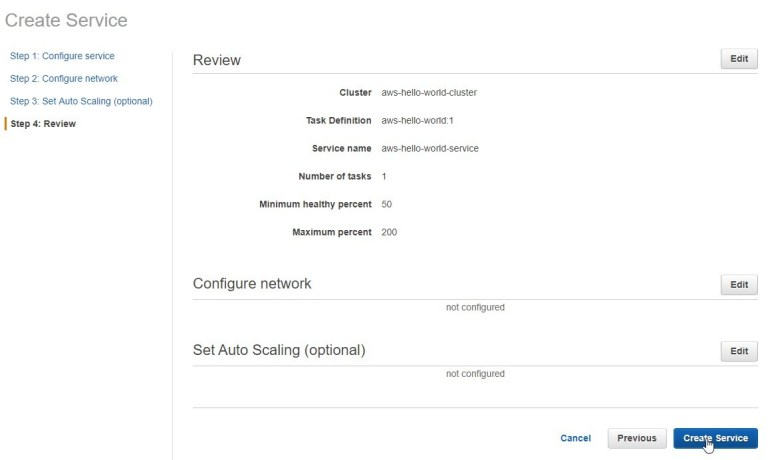
Creating a new Service for the Cluster
In my previous post, I uploaded my Docker image to my ECS Repository. I also created a Task Definition for that image. It should be easy to create a new Service definition to run my existing Task on this cluster. I select the "Services" tab, and then click the "Create" button.
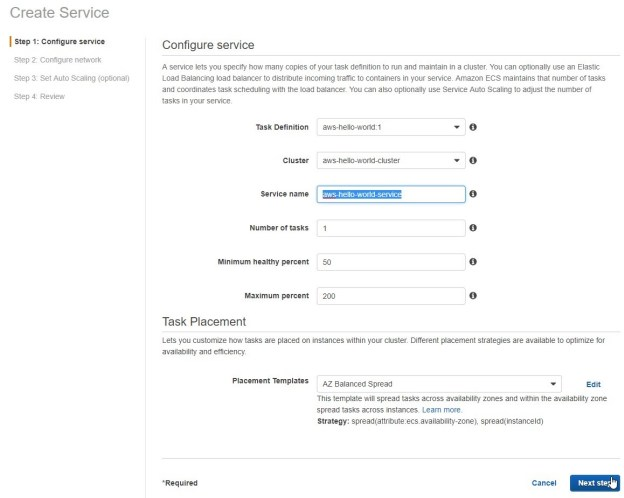
Creating a Service for the cluster – Step 1
The Task Definition and Cluster options were pre-populated for me, and didn’t need to be changed. I named my new service "aws-hello-world-service". I only want one instance of my Docker image to run, so I set the "Number of tasks" field to 1. I kept the default values for everything else.
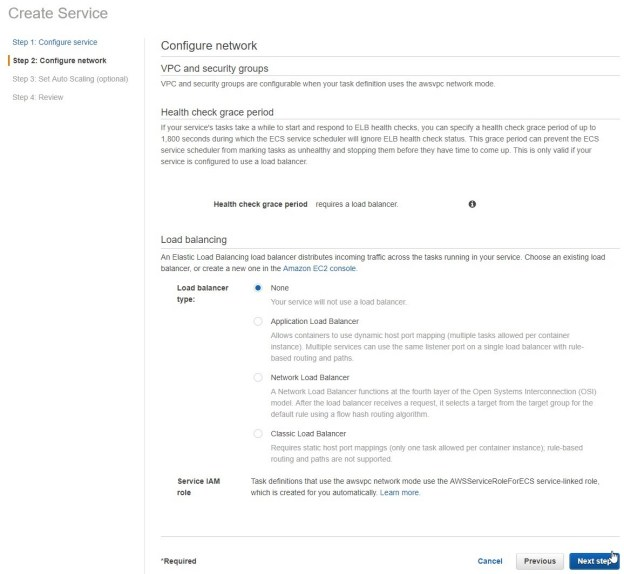
Creating a Service for the cluster – Step 2
I don’t want to add load balancing for this simple application. There is nothing else to set here, so I just click "Next step".

Creating a Service for the cluster – Step 3
Don’t want this either. Next!
Sometimes, when you’re trying create cluster with exsited service name you can get error "
AWS creation failed: Service already exists. (Service: AWSServiceDiscovery; Status Code: 400; Error Code: ServiceAlreadyExists; Request ID)". You need remove only registered services, do not remove namespace. Read more on stackoverflow.
OK, let’s see what happens when I click "Create Service"…
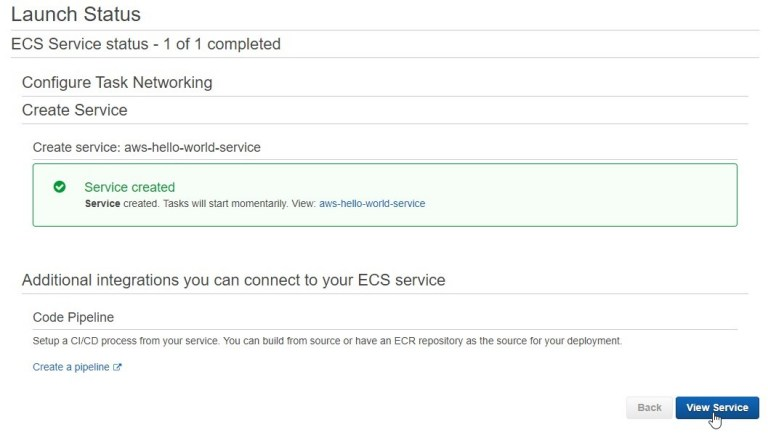
Looks like the Service was created. Great!
The comment about adding a pipeline to "build from source" is interesting. That’s something I’d like to check out in the future, but not right now.
I’ll click "View Service" and see how it looks.
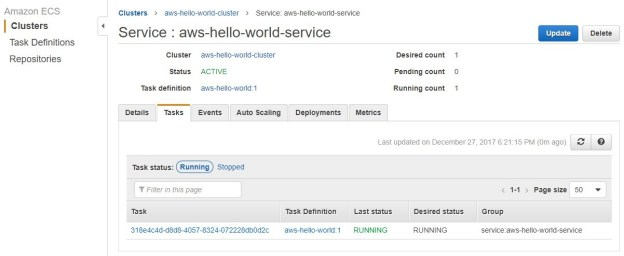
Details of the newly created ECS Service
This looks promising. The "Tasks" tab shows my "aws-hello-world" task in RUNNING status. If I understand correctly, that means my Docker image should be running somewhere. Now I just need to figure out where "somewhere" is.
The "Task" id is a link, so I’ll click on it and see where that takes me.

The "Task" details are interesting. I can see some of the Docker settings at the bottom of the page when I click the little arrow icon to expand the Container detail line.
The "Container instance" id near the top of the page (highlighted in screenshot) is a link. I click it to see the detail page for the Container that’s running my Docker image.
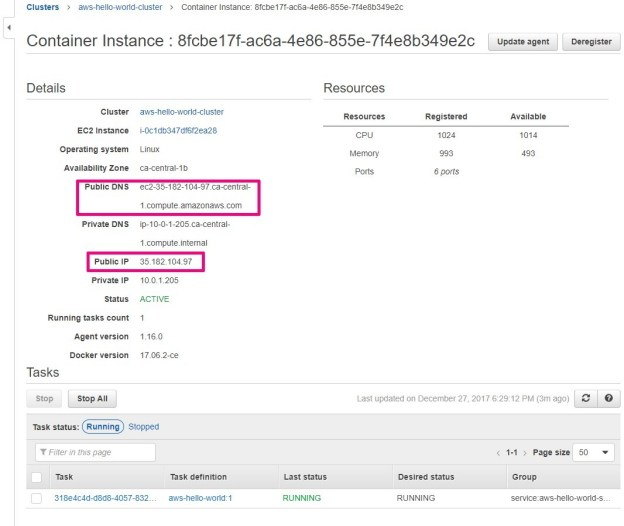
Details for Container that is running my Docker image
This is what I needed. The public facing DNS name and IP are provided here. I can copy either of these into a browser, and I should get back the simple "Hello" page from the running Docker image. Let’s see if it works.

Connecting to the container via browser
Success! 🙂
Now what?
There isn’t much I can do with a Docker image that consists of Apache web server and one static HTML page. Now that I’ve learned to deploy a trivial Docker image to AWS, I should be able to use the same process to deploy my Dockerized Spring Boot app image to AWS. There are plenty of interesting things I can do with a Spring Boot app on AWS. Those will have to wait until next time…